Digital currency exchanger rating

How to Store Jerky and Other Dried Meats


image credit

Home-dehydrated meats such as jerky don't store well for extended periods of time because of the high fat content; they turn rancid after several weeks. However, meats could be dried and stored in the freezer till you're ready to set off on a trip and could stay good for a week or so.

Types of meat to dry
Lean beef, chicken, turkey, rabbit, fully cooked boneless ham, venison, and other lean game meats may all be dried.

Preparation for drying
Fully cook the meat or poultry and remove any excess fat. It's also possible to use leftover meat that has been cooked to a tender state. Cut the meat into 1/2-inch cubes.

Storage
Store dehydrated meats in airtight containers or plastic bags in the freezer until ready to use.

Reconstituting Dried Meats
Allow meat to soak in broth or bouillon until plump; can be cooked with other ingredients.


How to Make Jerky

Jerky Marinade Recipes


© Athena G

Jerky Marinade Recipes


Marinate the sliced meat in one of the following recipes overnight in the refrigerator in a tightly covered container. You may also decide to smoke it if you have a meat and fish smoker, but generally, you marinate it first.  If you are new to making homemade jerky, you may wish to read the detailed instructions for jerky making HERE>>> How to Make Jerky

Marinade Recipes for Jerky

The following recipes are given for 2 pounds of sliced lean meat.

Spicy
2 tablespoons water
1 tablespoon A-1 steak sauce
1 tablespoon Worcestershire sauce
2 tablespoons soy sauce
1/2 teaspoon hickory-flavored liquid smoke
1/4 teaspoon pepper
1 teaspoon salt
1/2 teaspoon onion powder
1 clove crushed garlic

Teriyaki
1/2 cup soy sauce
1/4 cup brown sugar
1 teaspoon ground ginger
2 cloves crushed garlic
1/4 teaspoon pepper

Hot 'n' Spicy
2 tablespoons water
2 tablespoons Worcestershire sauce
2 tablespoons A-1 steak sauce
1/2 teaspoon liquid smoke VA teaspoon pepper
1 teaspoon salt
1/4 teaspoon cayenne
1/2 teaspoon onion powder
2 cloves crushed garlic

Sweet 'n' Sour
1 tablespoon soy sauce
1/2 cup vinegar
1/2 cup pineapple juice
1/3 cup brown sugar
3/4 teaspoon salt
1/4 teaspoon pepper
1 teaspoon onion powder
1 clove crushed garlic

© Athena Goodlight


How to Make Homemade Cheese (Hard Cheese)


2 gallons fresh milk (preferably raw)
1 cup cold water
3/4 Hansen's cheese rennet tablet, or 8 junket rennet tablets
2 tablespoons sea salt

Allow 1 gallon of the milk to ripen overnight in a cool place (50 to 60F). The next morning, add the other gallon. In a big, enamel or stainless-steel pot, warm the milk to 86F. Add tablet to the cold water, and stir until dissolved. Set the pot in a bigger vessel of warm water (88 to 90F), away from drafts. Add rennet solution, and stir well. Let stand undisturbed until a firm curd forms—about 30 to 45 minutes. Test the firmness by delicately putting a finger into the curd at an angle and lifting it. If curd breaks neatly over your finger, it is ready to cut. If not, let it set 15 to 20 minutes longer.

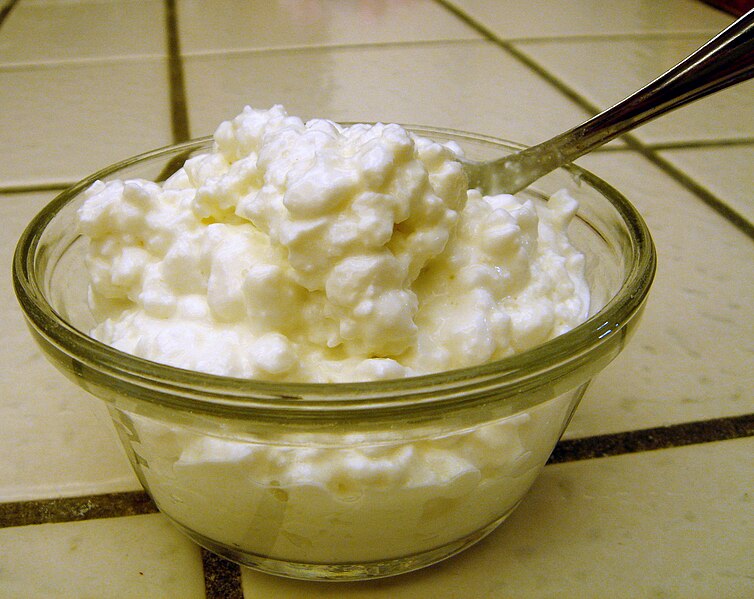
Take out pot from larger vessel, and cut curd into 3/8-inch cubes. Use a knife with a blade long enough to cut through to the bottom of pot without the handle's touching the curd. Stir curd cubes carefully but thoroughly using a wooden spoon for about 15 minutes; use long, slow movements so curds are not crushed. Put the pot in a larger pot with water (forging a double-boiler effect), and heat gradually, raising curds' temperature about 1 1/2 degrees every 5 minutes until it reaches 102F. Stir with a wooden spoon to hold on the curds from sticking together. Remove from heat when curds start to hold their shape and easily fall apart when held, but not squeezed, together.

Stir every 5 minutes for about 1 hour (you read that right!) to keep curds from sticking. Leave them in the whey till the mass becomes so firm that a handful of pieces, when pressed together, will shake apart easily. Place the curds on a double layer of 3-foot-square cheesecloth, and pull corners of cloth together. Swing gently, allowing curds roll back and forth so whey drains without squeezing. Sprinkle curds with half of sea salt, and mix thoroughly with wooden spoon. Sprinkle on remaining sea salt, and mix in by hand.

Tie the cheesecloth so curds form a ball; hang up, and allow the whey to drip for 45 minutes. Remove cheesecloth; fold it into a rectangular bandage, 3 inches by 3 feet, and wrap tightly around the ball. Using your hands, press down on ball until top and bottom are flat. Put three or four layers of cheesecloth under and over the cheese. Place in press; adjust pieces of wood; put a heavy object on the press; let it sit overnight. Turn, then press overnight once more.

Take out the cheese from the press, and remove cheesecloth wrapping. Allow to stand in a warm room (70 to 75F) for 6 hours while rind forms and dries out. Then coat using hot, melted paraffin. Holding the cheese with tongs, dip one half and then the other half. Or paint on paraffin with a basting brush. An alternate to paraffin coating is rubbing vegetable oil into the cheese. Ripen in a cool place (50 to 65F) 3 to 4 weeks; turn two or three times each week.

Makes about one pound of cheese

© Athena Goodlight

Cottage Cheese Dip Recipe


image credit: Elaine Eppler


2 cups homemade cottage cheese        
1 teaspoon minced parsley
1 teaspoon celery seeds           
1 teaspoon minced chives
1 teaspoon dill seeds                         
Pinch paprika
1 teaspoon caraway seeds

  • Blend cottage cheese with celery, dill, and caraway seeds. 
  • Add the parsley and chives. 
  • Chill for a few hours. 
  • Before serving, sprinkle lightly with paprika. 
  • Serve with crackers or bread rounds.


Makes 2 cups.

Cheese-Based Dessert: Coeur a la Creme


image credit
A delicious and simple dessert known as Coeur a la Creme—Heart of Cream—can be made using Yogurt Cream Cheese or Basic Cottage Cheese. Any fresh fruit may be used to garnish it. It's molded in a heart-shape basket

Coeur a la Crème

4 cups homemade cream cheese or cottage cheese       
2 tablespoons granulated sugar
1 pint fresh berries, sliced
1 cup Basic Yogurt
Granulated sugar to taste

  • Stir the cheese, at room temperature, with yogurt and 2 tablespoons sugar until smooth.
  • Line your heart-shape basket with cheesecloth; set on soup plate.
  • Pack the mixture into basket; drain and chill several hours, or overnight.
  • To serve, unmold; garnish with berries; sprinkle with sugar to taste.

Makes 8 servings.

© Athena G

Basic Cottage Cheese Recipe


image via Wikipedia


1/6 Hansen's cheese rennet tablet, or 2 junket rennet tablets
1/2 cup cold water
2 quarts skim milk
1/8 cup commercial cultured buttermilk

  • Dissolve the  rennet tablet in the cold water. 
  • Combine the skim milk and buttermilk. 
  • Heat the milk mixture to 70F. Add rennet solution, and stir thoroughly. 
  • Cover with a towel, and allow to stand at room temperature 12 to 18 hours, or until a smooth curd builds up. 
  • Using a long knife cut the curd into 1/2-inch pieces. 
  • Slowly heat the curds using a double-boiler top over hot water, until temperature reaches 110F. 
  • Maintain this temperature 20 to 30 minutes, stirring around every 5 minutes so curds heat uniformly. 
  • When the curds are firm, pour into a colander lined with cheesecloth, and let the whey drain off. 
  • Shift the curds around by slowly lifting the corners of the cloth. 
  • After whey has drained off, get corners of cloth together, and soak up for about 2 seconds in cold water. 
  • Work the curds using a wooden spoon to free them of any excess whey. 
  • Stir; chill.


Makes 8 servings


© Athena G.

Cheese Making and Homemade Cottage Cheese


image via Wikipedia

There are numerous legends regarding the discovery of cheese-making, most of them having elements in common: Somebody sets out on horseback on a journey, bringing along some milk in a pouch made from a calf s stomach. After a while, the traveler finds out that the milk has turned into a palatable sour curd.

Rennin, an enzyme present in the lining of a calf s stomach, turns milk into curds and whey and is used almost universally in cheese-making. The primary milk protein, casein, is curdled, or coagulated, by the enzyme action of rennet or pepsin, or by lactic acid manufactured by bacterial action, or by a combination of these.

Cheese is produced from the milk of various animals, including cow, buffalo, camel, ass, sheep, goat, mare, llama, reindeer, yak, and zebu. Like with yogurt, the flavor and consistency of cheese are dictated by the type of milk and the conditions under which it is transformed. And like wine, cheese has a myriad of varieties. Essentially, it is either soft or hard. Soft cheeses normally contain more moisture than hard cheeses. The homemaker can readily make soft cheeses, many of which have a cottage-cheese base.

Basic Cottage Cheese Recipe 
Coeur a la Creme Recipe
Cottage Cheese Dip Recipe


Recipe for Cheese Sauce in 20 Minutes or Less

 Grilled Ham and Cheese Sandwich Melt

 © Athena Goodlight

Jerusalem Artichoke Soup


image credit


4 tablespoons unrefined oil
1 pound Jerusalem artichokes, sliced thin
2 onions, sliced thin
2 cups hot water or vegetable stock
1/2 teaspoon sea salt or to taste
2 cups hot milk
1/8 teaspoon nutmeg


  • Heat a large saucepan. 
  • Add the oil, Jerusalem artichokes, and onions.
  • Cover and saute on low heat, stirring often until vegetables are almost tender. 
  • Add the water or stock and salt. 
  • Cover and simmer until vegetables are soft. 
  • Mash the vegetables or blend in a blender. 
  • Add the hot milk and nutmeg. 
  • Heat through. Jerusalem artichokes are mild and sweet. They make a delicate creamy soup.


SERVES 4

Easy French Onion Soup Recipe


image via Wikipedia


2 tablespoons unrefined corn germ oil
2 large onions, thinly sliced
1 tablespoon whole wheat flour
4 cups hot tamari broth or vegetable stock
sea salt
Garnish: toasted croutons, grated cheese


  • Heat a large saucepan. 
  • Add the oil and onions and saute until tender and golden brown.
  • Add the flour and cook over low heat for about 2 minutes, stirring constantly. 
  • Add the hot broth and simmer 5 to 10 minutes. 
  • Season to taste with sea salt. 
  • Serve hot with the garnish.


Turkey Soup Recipe


image via Wikipedia

Do not throw away the bones and the stock of Simmered Turkey (recipe here), and use it to cook a nice turkey soup. Add chopped celery, car­rots, and onions to the pot together with all the bones and some added pepper.  You may put some rice if you wish when the soup is cooked. It will be finished as a delicious side dish.

Preparing a Juicy Turkey Stew (Simmered Turkey)


  • Have a completely defrosted turkey. 
  • Take out the neck and giblets.
  • Place the whole turkey in a large pot. Cover entirely with cold water, then remove the turkey, leaving the water inside the pot. (This will let you know how much water you will use for the cooking.  Normally you will need about a 20-quart pot to cook a 10-pound turkey.)
  • Bring the water to a boil. 
  • Cut off the wings and legs from the turkey, and set aside. 
  • Put the body of the bird in the pot, and bring the water back to a boil. 
  • Lower the heat, cover the pot, and allow the water to simmer lightly for 45 minutes. 
  • Then add the wings and the legs to the pot. Cover the pot again, and simmer for another 45 minutes. 
  • Then leave the lid on the pot and the pot on the burner. Turn off the heat, and allow the bird to stay in its own liquid for 2 hours. It is now ready to remove and be served or used. 
  • At the end of the 2-hour period refrigerate everything and chill until the next day. 
Turkey tips

  • Don't store the turkey in aluminum, but stainless steel ware is OK.
  • Do not season the turkey while cooking. Salt dries out the bird. If you wish to add salt, add it afterwards just prior to serving.
  • Low-salt/low-fat eaters will love this turkey. Just remove the skin from the bird after cooking (this holds in most of the fat) then eat without guilt!
  • Remove the meat from the bone, and serve with a light gravy for a lovely meal. The meat will be very moist and freshly flavored.
  • Prepare giblet gravy by cooking the chopped giblets in some of the stock for at least an hour before the bird is to be served. Season to taste. 
  • You may add a bit of sage or thyme if you wish. 
  • You may refrigerate the bird in its juice, and slice it the next day for a light dinner.